Aerospatialle SA365N Dauphin 2 – Gallery

Probably the quickest build in my modelling career. Just over a month.

This is strict 'out of the box' build. Even the stand is made of the actual model's box. Since there was no scope for any detailing - I focused completely on the paint job. Red and white are a nightmare to work with. To make things worse - I tried to use the colour modulation technique to emphasize the natural shadows by varying brightness and hue of the paint. This, in theory, cheats the vision making the reception of the scaled object more realistic. It's barely visible on the finished model, but when turned upside down becomes very prominent.

This is the model of Icelandic Coast Guard Aerospatialle SA365N Dauphin 2 during its operational time, before the engine failure in 2007 resulting in ditching in the water during exercise flight.

Model itself is of reasonably good quality, but some sanding and filling is required. Canopy fit wasn't great, and I've worked on more detailed 1/72nd scale Trumpeter's models in the past than this 1/48th scale.

Here's the result of my recent work:


Aerospatialle SA365N Dauphin 2 – Part 8: last touches

Float covers got last bruch touch-ups to emphasize the fabric's minor ripples, and then sprayed with satin varnish to diffrenciate their surface from fuselage's metal gloss.


 Last pieces of masking! black areas around the exhausts, air inlets and anti-glare nose surface. Plain Tamiya XF-69 Nato Black without any modulation. For a change.

Anti-glare surface is just a coat of matte transparent varnish on the already painted nose section.

I didn't go mad on the weathering side. Just a tiny bit of exhaust stain that's visible on almost every photo of TF-SIF (except for the ones taken in the museum). I like airbrushing Tamiya's X-19 Smoke for the dark stains. It allows for good control over the intensity and area covered. X-19 is glossy by nature, so final matting around the area was done with transparent matte varnish.

One piece that's not strictly 'out of the box' is the antenna, but it's required by the model's assembly manual, so ticks the box. Another new purchase from Uschi van der Rosten - rigging line. No more damaging wife's tights. It's very thin stretchable thread that doesn't fray, and can be fixed with super glue. Isolators near the ends of the antenna were jsut small blobs of Surfacer, paintedd gloss black.

Aerospatialle SA365N Dauphin 2 – Part 7: final varnish

Last few elements left to be painted. Undercarriage assembled and painted  XF-80 Royal Light Grey. Shock pistons painted with mix of AK's True Metal mix of Silver and Gun Metal.

Float covers on the fuselage painted in XF-25 Light Sea Grey. As they are made of fabric I did some random shadows and highlights around the edges adding XF-2 White and XF-54 Dark Sea Grey to visually imitate uneven surface.

Some pin wash with oild paint Abteilung 502 Shadow Brown. I added some Buff colour to make the shadows less pronounced on the white areas.

Once the oils dried a little bit I wiped the was outside the crevices with the cosmetic buds. A lot of cosmetic buds.

Final coats of gloss varnish. I painted the upper fuselage first, let the varnish dry for 48 hours and then coated the underside, and put the whole assembly aside to cure in full.

I had some time to work on the base for the model while varnish was drying. Since it's rather strict 'out of the box' build - I didn't have much choice other than using what's in the box, or the box itself.

 I used the box art to create the plinth,

Finished base ready for the model.


Aerospatialle SA365N Dauphin 2 – Part 6: decals

Just, when I thought that sanding was a boring task. Masking again. This time for the red colour. I had to be rather precise to keep the constant distance from already painted blue colour.

Main body of red was sprayed with X-7 Red, and darkened in few places by adding few drops of X-3 Royal Blue. No need for highlights, as previously sprayed white coat showed through. Red doesn't cover very well, so preparing the undercoat is very important in achieving good, uniform finish.

 Masking for the nose was easy. XF-69 Nato Black with XF-1 Flat black for the areas where I wanted to emphasize the shadow.

Careful removal of the masks. I conveniently skipped all the overspray touch ups, as unfortunately I got the red colour getting under the mask in few spots. Reasonably easy fix - mask locally, and carefully airbrush locally to cover the overspray.

Coat of X-22 gloss varnish to prepare for the decals.

As feared. Decals turned out to be complete and utter rubbish. Decals dipped in water for few seconds merely touched, literally exploded like a sheet of glass. I managed to damage the tail flag and one of coat of arms before I gave up for the day and went for a walk to think of some sort of solution.

Tail flag was simply masked and sprayed. 0.4mm masking tape proved quite useful. I masked the shape and white areas first.

Sprayed the red cross, masked it and finally sprayed the blue areas.

This turned out rather well.

Coat of arms was painted freehand using wathmaker's loupe and 0000 brush. Turned out so-so.

To salvage the rest of the decals - I sprayed the sheet with rattle can clear gloss lacquer, and proceeded with application. The coat of varnish made the decals quite thick, so liberal application of Microscale Set/Sol decal softening fluids was essential.
I made a handy stand for the model out of the cardboard from the box to make it easier to apply the decals where I wanted them.

Once the decals dried everything was covered in yet another layer of X-22 clear varnish for protection and to build up smooth surface.

Aerospatialle SA365N Dauphin 2 – Part 5: base coats

I have happened to acquire Eduard's cockpit masks for the SA365 together with the model, so I proceeded immediately with applying them. The next thing I did was to throw them straight to the bin. The masks are dedicated to Kitty Hawk model, which seems to have every piece of glazing of a different shape than the Trumpeter.

Eventually I masked the windows with tape and Maskol. The all exciting task of filling and sanding continued for a while as the canopy was less than a perfect fit.

...and some more Surfacer 500, and even more sanding. 

Between sanding, and sanding, I primed all the small bits. Pieces that are to be painted metallic were painted with gloss black (Tamiya X-1) 

This project turned into a metallic frenzy. I wanted to test few different metallic paints. Exhaust was airbrushed with mix of Alclad's Jet Exhaust, Steel and Polished Brass to get the heat discolouration.

Camera was treated with steel metallic powder from Uschi van der Rosten. It's pretty amazing product, and the effect depends on the surface preparation (colour and glossiness). It's simply applied with q-tip, and then polished.

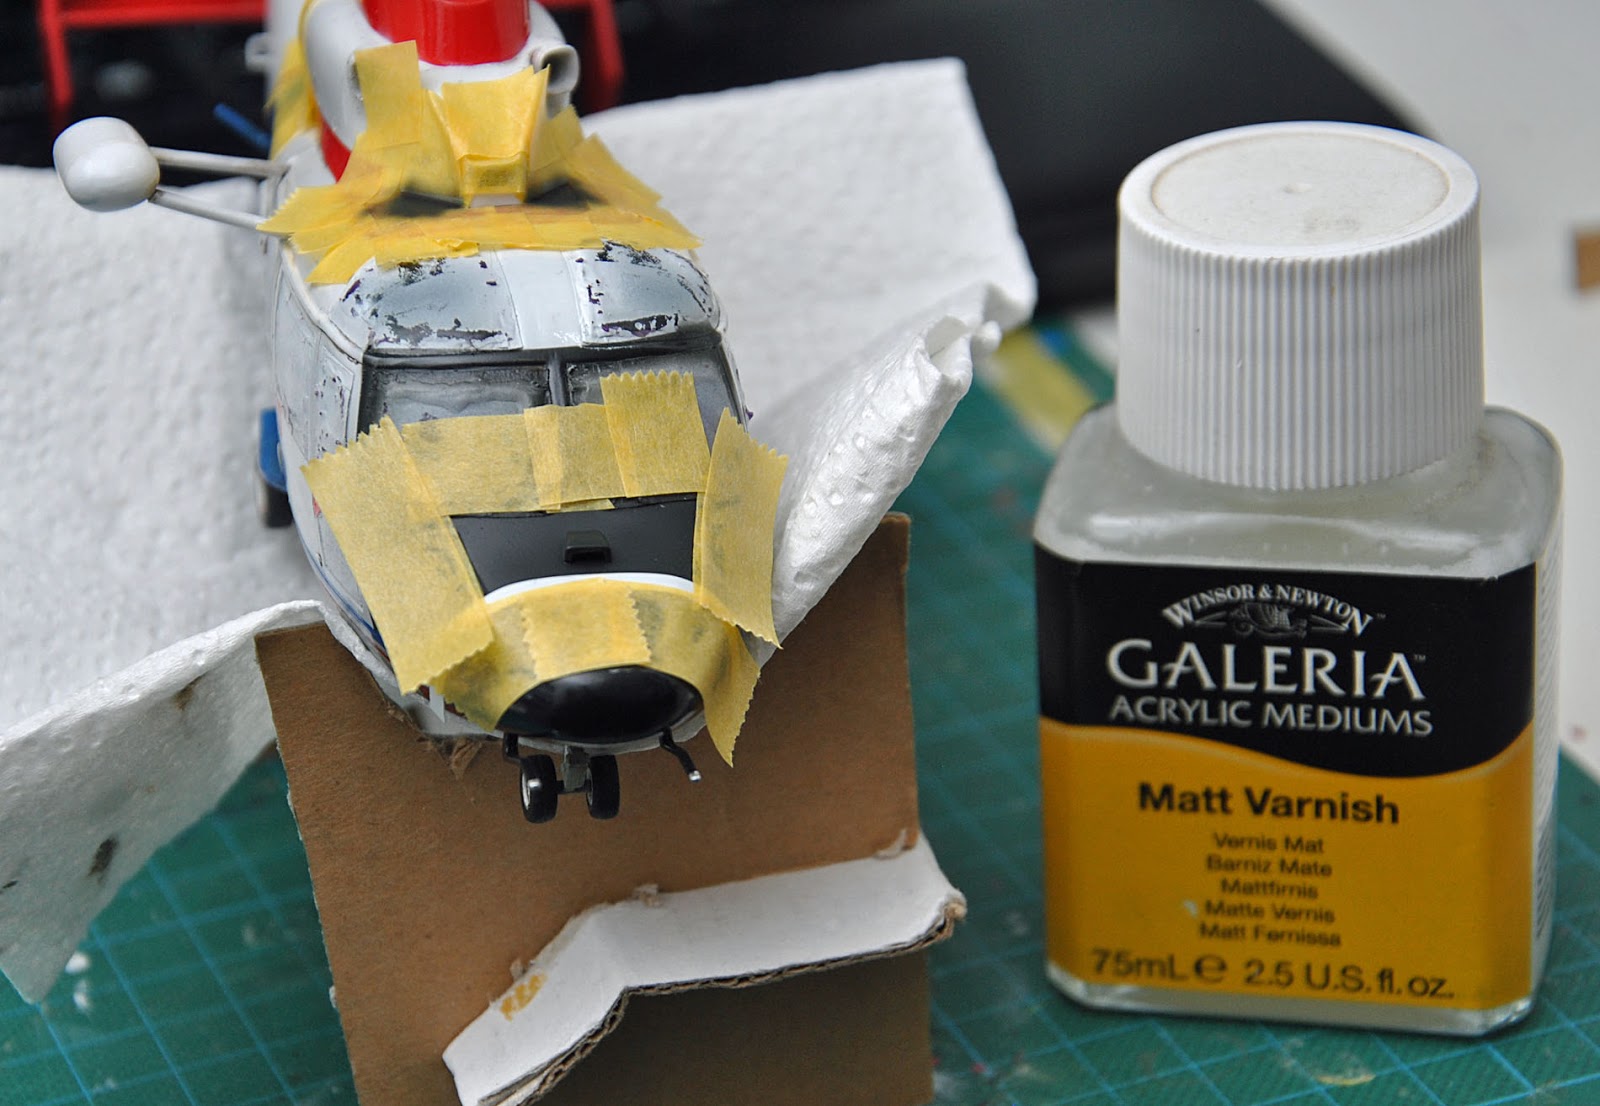
Back to the choppa...
Fuselage primed with Surfacer 1200. More sanding as the primer exposed all the flaws of the surface.

This model is a playground in painting experiments. Rather than usual preshading technique highlighting all the panel lines, I focused on darkening the shadows as observed in the real helicopter. I used XF-54 Dark Sea Grey and XF-63 German Grey to replicate and overemphasize the shadows (it will be partially lost under the base cot of paint).

All fuselage was painted with XF-2 Flat White. There's no real difference if the paint is matte, or gloss, as I will rely on the clear varnish to achieve final surface finish.
Undershading was somewhat lost, so the colour modulation was done with addition of XF-19 Sky Grey and XF-54 Dark Sea Grey.

Masking for the edges of blue stripes was done with another fresh purchase - Tamiya's masking tape for the curves. It's 2mm wide and is highly flexible to follow the odd shapes. More masking to prevent overspray was done with the usual yellow tape. Blue was sprayed with X-4 Blue. Highlights and shadows were done with the addition of X-14 Sky Blue and X-3 Royal Blue respectively.

Sigh of relief after removing masking. No overspray, and no paint peeling off. All the precautions with thorough degreasing and not touching the model with bare hands paid off.

Aerospatialle SA365N Dauphin 2 – Part 4: rotor

Now, for what's any helicopter's most disctincive part: the rotor.
Assembly was rather simple. Around 8 parts in total. Before the paining, with fresh memories of peeling paint in my previous model, I de-greased the assembly thoroughly with isopropyl alcohol, and primed it wirh Surfacer 1200.

Having studied photos of the original helicopter, I noticed that all the rotor blades were colour coded to match their respective mounting points. Perfect excuse to put in action newly acquired 0.4mm masking tape.

Centre of the rotor was painted with Tamiya's XF-80 Royal Light Gray, blending to XF-54  Dark Sea Gray underside, and then masked with industrial amounts of maskol.
Rotor blades were painted with XF-51 Khaki Drab, and trailing edges were slightly highlighted with mix of XF-51 and XF-80.

First exercise in masking tape waste. Trailing edge painted with XF-69 Nato Black. I'm trying to limit the use of pure black in my models to minimum, to allow for deeper shadows on the areas that are painted black. 

Markings on underside of the blades. Circular masks were cut in masking tape using leather punches. 

Gloss varnish on the whole assembly after removing the masking to get a nice, smooth surface for the wash.

Subtle pin wash on the centre of the rotor with mix of oil paints: Dark mud and Buff. Final coat of acrylic satin varnish.

Once the varnish is completely dry (48 hours or so), second exercise in masking tape waste - masking the leading edges of the blades. Brush painted with wax metallic AK True Metal paints. Mixture of 80% Gun Metal and 20% Aluminium.

Once the paint is dried and masking removed I buffed the metallic paint with q-tips with strokes perpendicular to the edge leaving ever so slightly uneven shine to replicate the wear on the rotor leading edges.